Instantly Improve Your Kitchen Knife Skills
Welcome to Cooking 101, a fun, weekly series of cooking lessons and hands-on learning from America's Test Kitchen Cooking School. Who are we? Our knowledge and techniques are based on 20 years of test kitchen work creating foolproof recipes for Cook's Illustrated magazine and for our television shows. We believe that everybody, whether novice or advanced, can gain the skills and confidence to become a better cook.

Week 12: Knife School
(read other Cooking 101 posts)
If you can prep your ingredients quickly, then you're well on your way to being faster and more efficient in the kitchen. Crucial to being a speedy prep cook, however, is having the right knives and making sure they are sharp. Here's a quick guide that will set you up with the basics that we think are essential for every good cook. If you're eager to learn more, take your cooking skills to a new level with more than 100 fun, interactive, online courses in our online cooking school.
THE 3 KNIVES YOU REALLY NEED
Although there are hundreds of gadgets for sale that claim they can help you prep ingredients more quickly, we've found that very few of them actually work. So instead of wasting your money (and your counter space) on these products, just invest in three good knives.

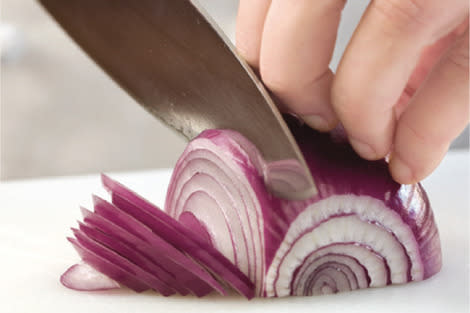
1. A Chef's Knife
From chopping an onion to mincing herbs and butchering a chicken, this one knife will handle 90 percent of your ingredient prep. Our favorite chef's knife is the Victorinox Fibrox 8-inch Chef's Knife.

2. A Paring Knife
A paring knife is essential for tasks that require more dexterity and precision than a chef's knife can provide: peeling and coring apples, deveining shrimp, cutting citrus segments, and more. Our favorite paring knife is the Wüsthof Classic with PEtec 3 1⁄2-inch Paring Knife.

3. A Serrated Knife
The pointed serrations of a good serrated bread knife glide through crusty breads, bagels, and the tough skins of tomatoes to produce neat slices, while a poorly designed bread knife slips, stutters, and shreds its way through food. Our favorite serrated knife is the Wüsthof Classic 10-inch Bread Knife.
KEEPING YOUR KNIVES ON POINT
A sharp knife is a fast knife, and a dull knife is an accident waiting to happen (which will really slow you down). Dull knives are dangerous because the dull blade requires more force to do the job and so has a higher chance of slipping and missing the mark. Even the best knives will dull over time with regular use.

Is It Sharp?
To determine if your knife needs sharpening, put it to the paper test. Hold a folded, but not creased, sheet of newspaper by one end. Lay the blade against the top edge at an angle and slice outward. If the knife fails to slice cleanly, try steeling it. If it still fails, it needs sharpening.

When to Use a Sharpening Steel
A so-called sharpening steel, the metal rod sold with most knife sets, doesn't really sharpen a knife, but rather it hones the edges of a slightly dulled blade. (If your knife is really dull, you need to use a sharpener to restore the blade edge.) To safely use a steel, hold it vertically with the tip firmly planted on the counter. Hold the knife so that the blade is at a 20-degree angle to the steel. Run the knife down both sides of the steel in a sweeping motion several times.

Knife Sharpeners
If your knife is quite dull, you'll need to reshape its edge in order to make it sharp again. Of course you can always send it out to a professional knife sharpener, but we've found two great at-home options that work nearly as well: an electric and a manual sharpener. Our favorite electric model is the Chef'sChoice 130; this machine makes quick work of very dull knives and is easy to use. Our favorite manual sharpener is a simple hand-held device called the AccuSharp Knife and Tool Sharpener.
HOLDING A KNIFE
Much like holding a baseball bat, how you hold a knife can make a difference in terms of control and force. And don't forget about the other hand-the one that holds the food securely in place while you cut. How you hold the food steady can make a difference in terms of fingertip safety.

Control Grip
For more control, choke up on the handle and actually grip the blade of the knife between your thumb and forefinger.

Force Grip
Holding the knife back on the handle allows you to use more force, and is helpful when cutting through hard foods or bone.
Protecting Your Fingertips
Proper positioning can prevent the fingertips on your noncutting hand from getting nicked by the blade. Use the "bear claw" grip by tucking your fingertips back away from the knife and letting your knuckles rest against the side of the blade. Reposition your hand as needed with every slice.
READY TO COOK? In our full Knife Skills course, available to enrolled online cooking school students, we teach you everything you need to know, from chopping an onion with precision to stocking up on essential equipment.
See what we're up to at America's Test Kitchen Cooking School. Get access to our complete catalog of over 100 courses, receive personalized one-on-one instruction, and become a better cook today!
