Easy DIY Ways to Button Up Your House for Fall
Save yourself thousands in future repair, maintenance, and energy costs by not leaving these minor problems to get out of hand.
Beef Up Insulation in an Unfinished Attic

WHY NOW:
Baby, it's cold outside-or it will be soon. "So pop your head up in the attic and check insulation levels," says Mike Rogers of GreenHomes America, which specializes in energy-efficient improvements. In addition to sealing gaps in the attic floor and framing, Rogers recommends upping insulation levels to R-49 or even as high as R-60 for most areas of the country.
HOW TO DO IT:
If insulation is level with or below the ceiling joists, add loose fiberglass or cellulose-even over existing batts-using a rented blower. Make sure the material is well distributed, with no low spots. "Even a small gap greatly undermines performance," Rogers says.
THE PAYOFF:
Up to 10 percent savings on your utility bills.
RELATED: See all 12 Easy DIY Fall Fix-Ups at thisoldhouse.com
Remove Aggressive Vines
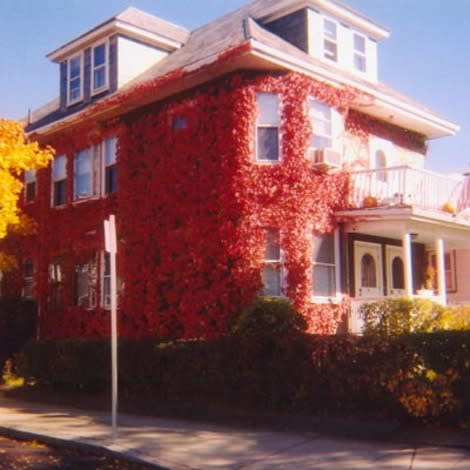
WHY NOW:
On brick or stone home facades, climbers with suckers, such as Virginia creeper, pull the lime out of the mortar, creating entry points for water. Vines also hold moisture against walls, which can wreak havoc on wood clapboards, slowing their ability to dry out after a rain and causing rot. If vines get between boards, they can push them apart.
HOW TO DO IT:
"Pull all the vines off, working from the top down; cut them at the base, and dig out the roots," says TOH landscape contractor Roger Cook. To remove any residue left behind on wood siding, do a quick pass with an orbital sander. Come spring, paint an herbicide on any new growth.
THE PAYOFF:
You'll avert having to spend up to $25 per square foot for professional mortar repointing. For wood houses, dodge up to $3,000 to re-side and rebuild a rotted clapboard wall.
RELATED:TOH Landscape Contractor Roger Cook's Fall Landscaping Checklist
Flush the Water Heater
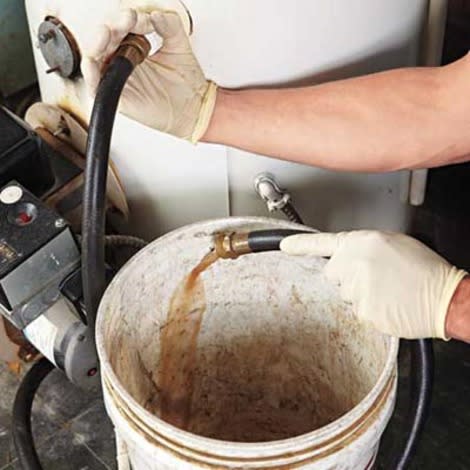
Sediment build-up displaces water and prevents the heater from operating at full capacity. By flushing the tank once a year, usually before winter, you won't be wasting cash by heating this gunk. Start by turning off the heater and letting the tank cool; then shut off the water supply. If gravity is on your side, connect a hose to the drain cock and run it to a floor drain. If you don't have a drain, send the water to a sink or bucket using a drill pump (a $15 attachment that will suction water out of the heater). Draining 3 gallons is usually enough, but you may have to fill and flush a few times until the water's clear. WATCH THE HOW-TO VIDEO.
More from This Old House:
Fall Furnace Maintenance, a Step-by-Step
Like Us on Facebook for Exclusive Deals of the Day
Check Us Out at Tumblr!
