How to Turn a Picture Frame into a Magnet Board
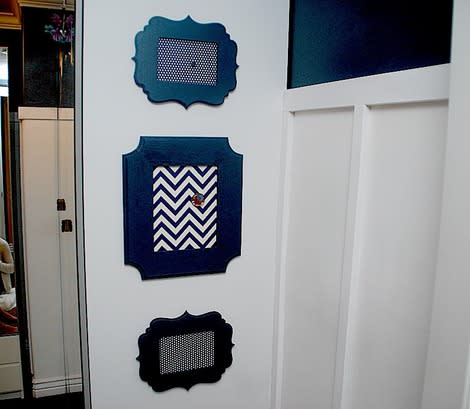
I just finished abedroom redo for my daughter. The challenge was to make her basement room seem brighter and more inviting. I also wanted to make a place in her room where she can display pictures of her friends and mementos. My solution: picture frame magnet boards on one side of her wardrobe.
This is an easy project -- it only takes 5 steps. You can use new frames or frames you already have. You can use frames of any shape or size. Just follow the steps below:
1. Paint the frames.
2. Once the frames are painted, measure the space inside of the frame and cut a piece of metal sheeting that size with heavy-duty scissors or tin snips. You can buy magnetic metal sheeting in rolls or big sheets from the roofing and heating section of your local hardware store.
Related: 5 new ideas for decorating with family photos
3. If you want to make the magnet boards a little more colorful, like I did, you can adhere scrapbook paper to the top of the metal sheets. I just used scrapbook adhesive.
4. Pop the paper-covered metal into the frame.
5. Use nails or 3M picture hanging strips to hang up the magnetic boards.
Related: 15 creative workspaces for kids
This project makes such a big impact is so few steps. Where would you display a magnet board?
- By Jennifer Hadfield
Follow Jen on Babble
For 18 creative family picture poses, visit Babble!
MORE ON BABBLE
10 everyday items that double as organizers
10 stylish storage benches you can make yourself
20 home projects you can get done over the weekend
15 ways to organize a small home or apartment
25 clever storage tips and tricks on a budget