Upcycled Crafts Using Halloween Earrings
By Terri O. for GalTime.com
Serendipitously, my friend was late meeting me for a cup of coffee and I wandered into a nearby thrift store with an eye to what I could upcycle into a craft.
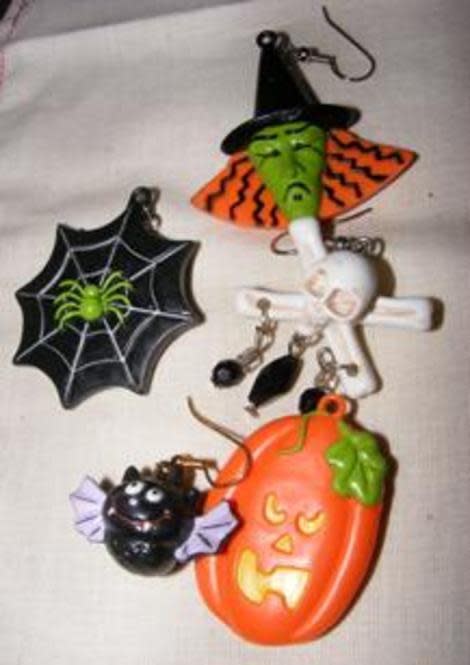
The Halloween collection of items was pretty picked over, but as I meandered down the aisle, a box full of orange, white and black things caught my eye. My first thought was toys, but no... How many plastic Halloween earrings can one person wear? Whoever she was, she loved the night that children dressed as princesses, super heroes, ghosts, bumblebees and lions, for the box I found was full of Halloween earrings priced at $2. I couldn't resist.
I had the ribbon and rhinestones on hand, but most of the other items I used in these projects can be found at a dollar store. I have also seen skeleton earrings at the local drug store.
I embellished a pair of skeleton earrings, and now they are a couple. I used a few of the earrings to make a fun candy tin, and a pair of skull and crossbones earrings to make a holiday-themed headband.
It only takes about an hour to make all three super simple projects!
Related: Six Spooktacular Ways to Decorate For Halloween On A Dime

SKELETON EARRING COUPLE
You need:
1 Pair of Jointed Skeleton Earrings
Ribbon Rags
5 Rhinestones
Craft Glue
Needle and Thread
Toothpicks
Instructions:
Tie a small strip of ragged ribbon around his neck for a tattered tie.
Glue another strip of ragged ribbon around her torso for a bodice.
Use a toothpick to place the glue so you don't accidentally get glue in the skeletons' jump ring joints.
Sew a few small strips of ragged ribbon onto her waist for a skirt.
Glue another rhinestone on her left hand.
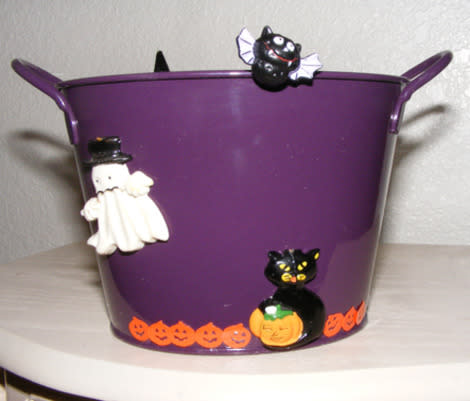
HALLOWEEN ICONS CANDY TIN
You need:
1 Small Tin
Assortment of Flat Back Plastic Halloween Earrings
Craft Stick (colored with a black marker)
Plastic Halloween Pumpkin Confetti
Craft Glue
Wire Cutters
Instructions:
Snip off the earring wires.
Glue the pumpkin confetti around the base, either all the way around or grouped.
Decide which earrings you want to use and where you want to place them.
Glue in place.
I glued the craft stick on the inside of the tin in order to place the bat in the "air" for a 3D look.
Related: 5 Adorable, Easy Halloween Kid Crafts
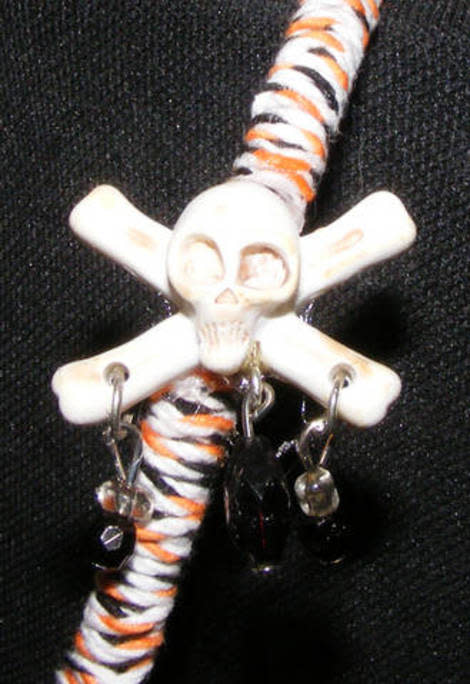
SPOOKY SKULL HEADBAND
You need:
Black, White, and Orange Twine
Plastic Headband
Skull Earrings
Wire Cutters
Craft Glue
Instructions:
Snip off the earring wires.
Gather the three strands of twine together, tie at one end of the headband and then coil around. Tie at opposite end.
Glue the skulls on either side of the headband.
Use a toothpick to put a dot of glue to secure each tied end of twine.
Here's hoping you have a Halloween that is spooky, fun and full of many more tricks than treats. Happy Halloween!
More from GalTime.com:
