The One-Stop Guide to Canning
Inspired by conversations on the Food52 Hotline, we're sharing tips and tricks that make navigating all of our kitchens easier and more fun.
Today: Virginia Willis, author of Southern Living Little Jars, Big Flavors, gives us a step-by-step guide to boiling-water canning.
Down South the age-old art of home canning is known as "puttin up" -- and oh, do we know how! I grew up in a family committed to preserving. Both of my grandparents had grown up in the country and both had lived during the Great Depression; they passed the practice along to their children. Preserving food was a way of life.
Black eyed peas, butterbeans, and creamed corn were frozen; peaches, wild blackberries, scuppernongs, and muscadines were transformed into jams and jellies; green beans and tomatoes were canned in summer and in the fall the canning kettle held quart jars filled with peanuts, pears, and spicy chow chow. Cucumbers were sliced and transformed into bread and butter pickles, or quartered and packed with herbs and spices for tangy dill spears.

Canning was even taken on the road! My grandparents had a camper and traveled several times to Alaska from Georgia for months at a time. For the long trip they would pack cases of home-canned green beans. When they arrived in Alaska, they would fish for wild salmon. My grandmother, whom I called Meme, packed her trusty pressure canner -- and on the tiny stove of their motor home would put up salmon in the now-empty green beans jars. I was well into college before I had salmon that wasn't home-canned.
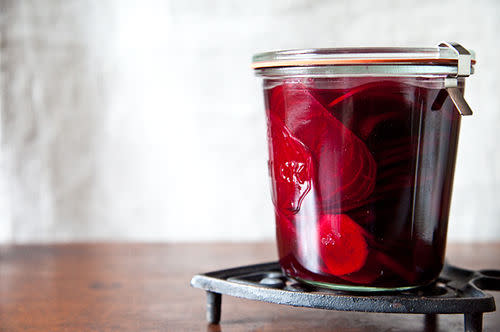
One technique that's indispensable is boiling water canning. High-acid foods are processed in the boiling water bath canner, ensuring the safety of the preserved produce by destroying harmful molds, yeasts, and some bacteria. Foods such as fruits, pickles, sauerkraut, jams, jellies, marmalades, and fruit butters are high acid with a pH level of 4.6 or lower can be preserved by boiling water canning. (Low acid foods require a pressure cooker and are a whole other story.) Boiling water canning consists of a large pot, tall enough to fully submerge the canning jars with an inch of water over top. The pot is used for both the sterilization of jars prior to filling and also for boiling the jars once they are filled. Follow these instructions so you can get busy with putting up!
More: Get everything you need to start canning in our Provisions collection, Small Batch: Jamming.
Sterilize Jars & Prepare Lids
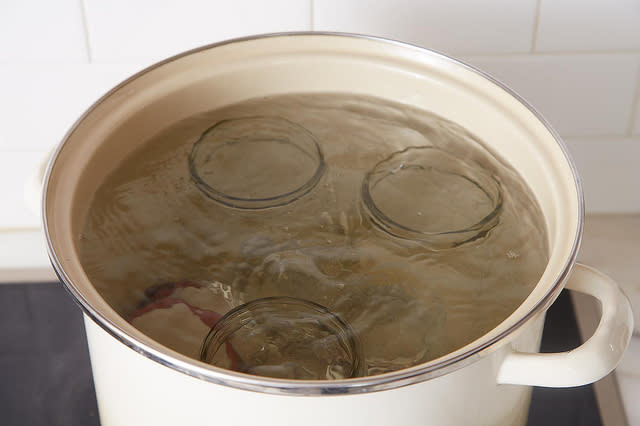
Place your clean canning jars on a rack in the bottom of the canning pot, and add water to fill the jars and cover them by two inches. (If you don't have a canning rack, you can make one yourself by tying jar lids together in a circle with twine.) Cover the pot, and bring the water to a rolling boil over high heat. Add the lids to the hot water. After the water reaches a boil, boil them for 10 minutes, then reduce the heat and maintain at a simmer until you're ready to fill the jars. Jars must be hot when food goes into them.
Fill & Process Jars
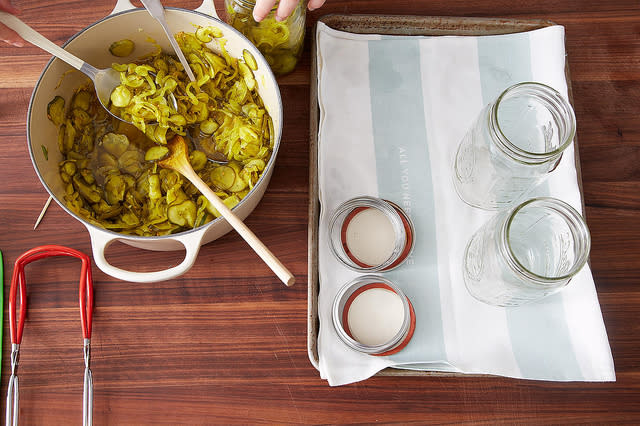
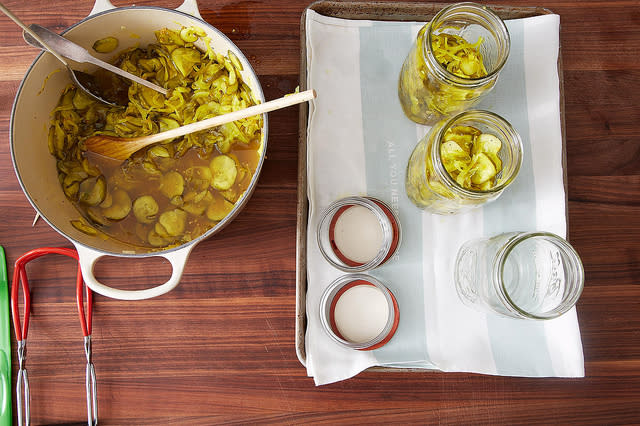
Line a rimmed baking sheet with a clean towel. Remove jars from the simmering water using a jar lifter, and carefully pour the water in the jars back into the pot. Place the jars upright on the prepared baking sheet.
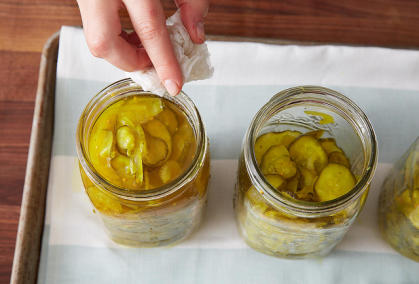
Pack any recipe-specified solid ingredients (such as herbs or cut vegetables for a pickle) into the hot jars. Ladle or pour hot mixture or brine into the hot jars, using a widemouthed canning funnel to help keep the jar rims clean. Leave the recipe-specified amount of headspace, the space from the very top of the jar to the surface of the liquid or food inside. Repeat with remaining jars, working quickly to ensure that hot mixtures go into hot jars.
Tap the jars lightly to help the contents settle, and stir gently with a wooden utensil to free any trapped air bubbles. Add more hot mixture or brine as needed to reach the correct headspace. Wipe the rims clean of any spilled food using a clean kitchen towel dipped in hot water.

Use tongs or a magnetic lid wand to place a lid, white side down, on top of each jar.

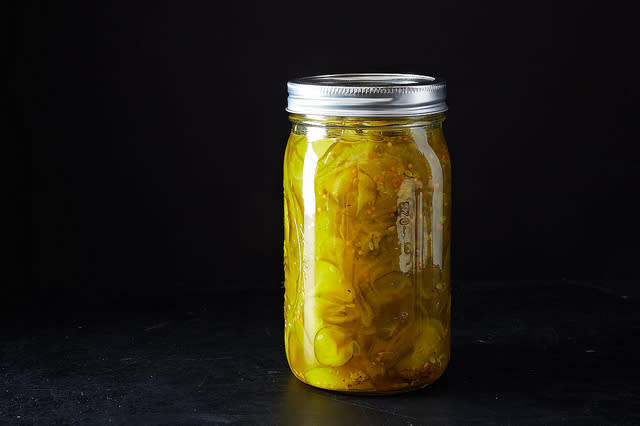
Place a band onto each jar; screw just until fingertip-tight. Carefully lower the filled jars into the pot of simmering water using the jar lifter to keep them upright. Add more water, if needed, to bring the water level to two inches above the jar tops. Cover the pot, increase the heat, and return the water to a full rolling boil. After the water reaches a boil, set a timer, and boil for the amount of time specified in the recipe, adjusting if needed for your altitude.
Turn off the heat, uncover the pot, and wait until the boiling has subsided (about 5 minutes). Remove jars using the jar lifter, being careful to keep them upright.
Transfer jars to a towel-lined or wooden surface where they can rest undisturbed 12 to 24 hours. Do not tighten or adjust bands. Lids may make a popping noise as the jars cool. Not to worry. That's one sign of an airtight seal-and the sound of canning success.
Check Seals, Label, & Store
When the jars have cooled 12 to 24 hours, remove the bands and inspect the lids. Each lid should be sucked down a little in the middle and firmly attached at the edges. Press down on the center of each lid with your finger. If the lid doesn't move, the jar is sealed and can be stored in a cool, dark place for up to 1 year (or as specified in the recipe).
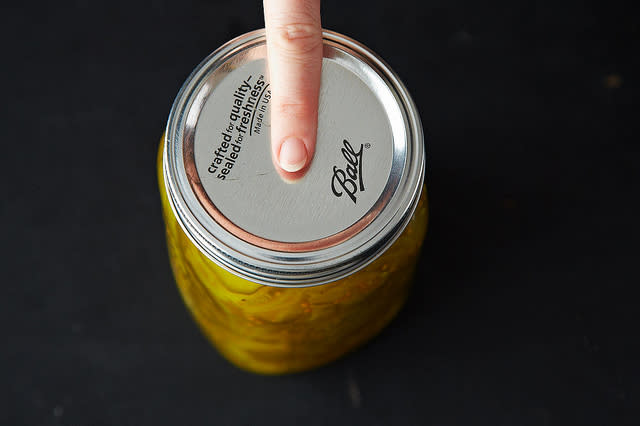
If the lid center depresses and pops up again, the jar isn't sealed and should be refrigerated immediately and its contents used within a few days.
More: Test out your new canning skills on this Honey Sweetened White Peach Jam.
Photos by James Ransom
What are your favorite things to put up? Let us know in the comments!

